If you haven't already start with
Creating realistic hair with V-ray for Maya part 1 If you have completed that one then let's get started!
This tutorial will begin assuming that you have created all your hair guide curves from the last tutorial already.
Now create a cube in your work space. Select your cube and under the Dynamics menu subset in the top go to Hair>Create Hair. This will create a Maya hair system for you to use. Hair system1
Now select all your curves (you will probably have to UNGROUP them all first) and go to the menu hair>assign hair system>hairsystemshape1
Immediately this will apply the maya system to all your curves. If we render the hair right now it will look pretty bad.
LIGHTING SETUP: For this test setup I have a v-ray dome light set to white at 1.0 intensity with all other settings default. And one directional light at an angle set to 2.0 intensity and casting raytraced shadows from behind off to the right side. And one Rectangular v-ray light at intensity 15 off to the left somewhat close to the face and nearly as large as the face and neck. Set that up quickly and you should be getting similar renders.
Let's work on the hair now. Select your hair. Then in the attribute editor choose the top tab.hairsystemshape1
To add a v-ray shader attribute. Click atributes button >vray>hair shader
Now in your attribute editor scroll all the way down and expand the "Extra attributes" rollout. Click the checkerbox next to Vray Hair Shader to link a shader to it. In the pop up choose v-ray hair shader 3.
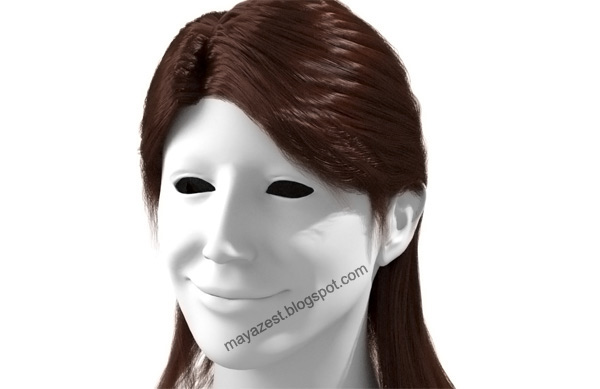
Now if we do a render we get something like this.
So the two important items we have to deal with now are.
1. Our Maya hair system - controls density, thickness, shape of each hair cluster
2. Our vray hair shader, controls the shading and light penetration.
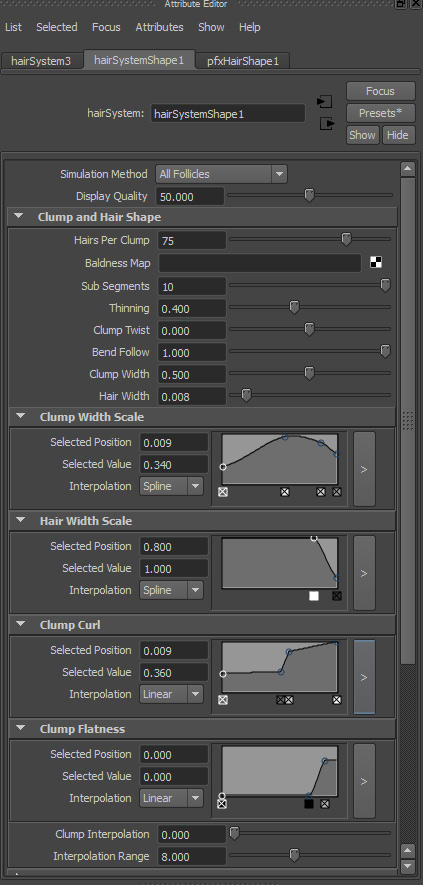
First thing we need to do is work on our maya hair system settings to thicken it up. In your outliner select hairSystem1 to pull up it's settings in the attribute editor on the right. Most of the settings are fairly obvious as to what affect they will have. Here are my settings duplicate them.
With these settings it should look something like this.
Now let's update the v-ray shader settings to make her hair darker and silkier. Scroll down to the bottom of your hair attributes and click the arrow next to your v-ray hair shader to open it's attributes. (or just open your v-ray hair shader in the hypershade) Here are my settings.
Render now and you will see it is way to dark.
Let me show you why. We need to render in the v-ray VFB in your render settings VrayCommon tab under the Resolution rollout. Click show V-ray VFB. Now render your image in the VFB using the little teapot button. When complete select the little sRGB button in the bottom of the VFB to see what you have actually rendered.
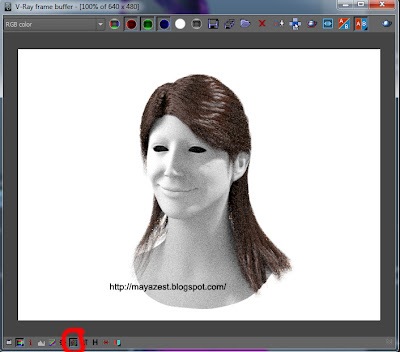
Brightness is better but the image quality is really grainy.
UPDATED: Fixing this is a two part process first we must fix the gamma and color mapping. Go to your v-ray render settings Vray Tab, then go down to the color mapping rollout. Change the Gamma settings to 2.2 and make sure "Don't effect colors (adaptation only) IS ticked.
The advantage of ticking ‘Don’t affect colours (adaption only)’ is that the Gamma 2.2 will not be ‘burnt in’ to the final image, however V-Ray will proceed with all its calculations as though color mapping is applied. In effect this enables VRay to calculate better noise samples as it is sampling a brighter image, so the differences between light and dark tones are easier to detect.
Now in your render settings Indirect Illumination tab turn on GI, primary bounces set to Brute force, and Secondary set to Light cache. Render again.

Everything is a little lighter and a little smoother.
At this point the main two factors effecting our grainyness are the sampling subdives on our dome light and the antialiasing samples. Make sure your are set to adaptive DMC under your render settings Vray tab, Image Sampler rollout and change max subdivs to 34
Render again, it takes a bit longer and things are significantly smoother. The remaining grain is from our dome light. Select it and change your sampling subdives up to 24 in it's attributes.
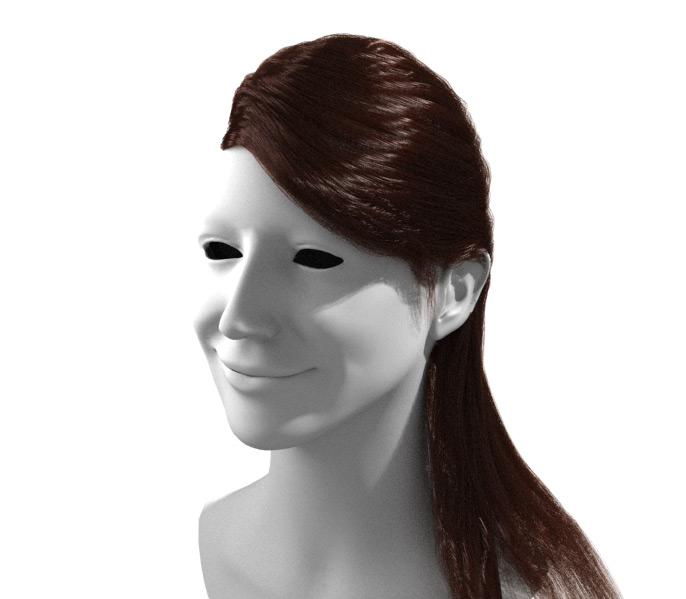
Now render an things are looking pretty good! I hope this gives a decent starting place for your hair. tweak the settings and experiment! Lastly I tweaked the color of the final render.