Search Maya Zest


Tuesday, July 23, 2013

Ptex displacement and texturing in Mudbox to V-ray for Maya PART 1


  • CREATING YOUR BASE MESH
First create your basemesh in Maya or your tool of choice. Ptex is not a silver bullet so here are some things to remember when creating your base mesh.
  • Be very careful how high you take your ptex texel resolution. You can basically bring your computer to it's knees.
  • Ptex will work best with EVENLY SPACED Topology. Otherwise parts of your model will be high res and other parts will be pixelated.
  • Try to use quads whenever possible, tris and n-gons may introduce problems.
  • Clean your model up. Polygons menu set>Mesh>cleanup in maya. Try not to have any errors when you import into Mudbox.
  • Correct SCALE. Export your OBJ base mesh from Maya at the same scale as a default Mudbox model. DO NOT scale your mesh up or down. Export it from Maya at the correct size initially.

Keeping these in mind. Let's continue!

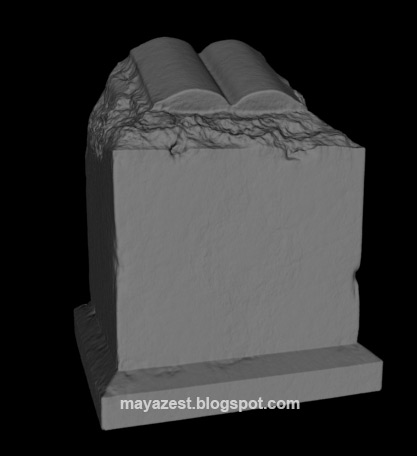
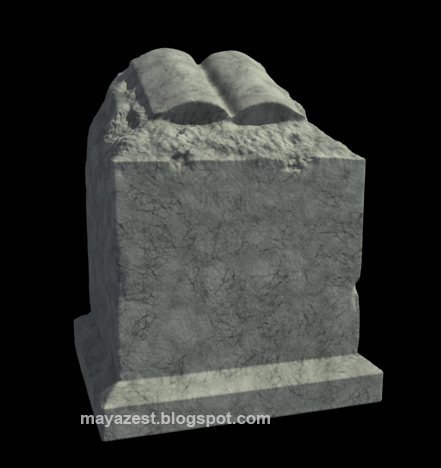
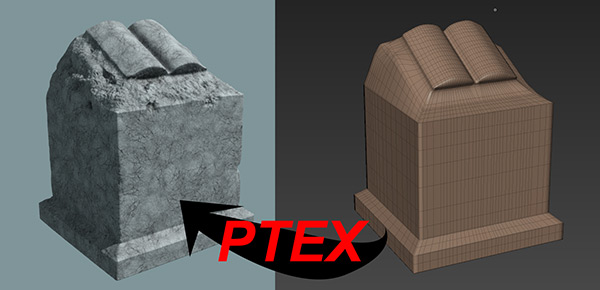
1. Export your mesh as an OBJ from Maya or your tool of choice. Here is my mesh. It's more detailed then it needs to be but it will serve to show this process just fine.


  • WORKING WITH THE MODEL IN MUDBOX
2. Goto file>import and select your OBJ. Mine only gives an “incomplete UV set” message” because I didn't create any UV”s for the model. This isn't a problem continue on.


3.Select your mesh in mudbox. Then go to UV & Maps>PTEX Setup. Your model will get covered with diamonds showing the resolution of the ptex. 


4. Increase or decrease the resolution until the diamonds are sharp at the distance you will be seeing it in the final render. In my case i'm going with 16m texels (roughly 4k texture resolution. Press “done”.

  • Ptex Tips

If you want to increase the resolution of just a part of your Ptex file (like add a larger Ptex
to just the forehead of a face)... Go to Windows -> Preferences -> Render -> Render Selected By Face.

If you ever need to upres or downres your Ptex painting later, just go back into UV & Maps>PTEX
Setup, it will remember your current setting, and let you modify the resolution. Remember, the
more resolution, the larger your Ptex file and the more RAM it takes up.

5. Now that we have ptex setup let's start sculpting. Press shift  'D' to increase the desired subdivision level from zero. I'm taking mine to up to level 5.

6. Sculpt and paint your model. Lots of tutorials about that process online so I won't go into that at all. Once complete move on to the next step.

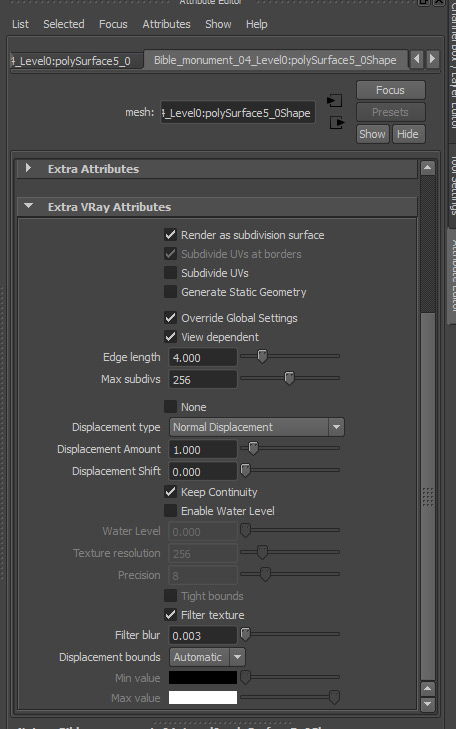
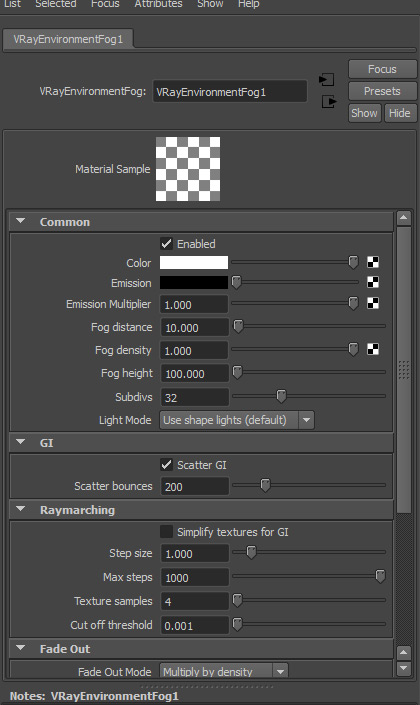
  • EXPORT YOUR DISPLACEMENT FOR MAYA (Mudbox 2014)
7. Go to UV's & Maps> Extract texture maps> New Operation' from the menu bar.


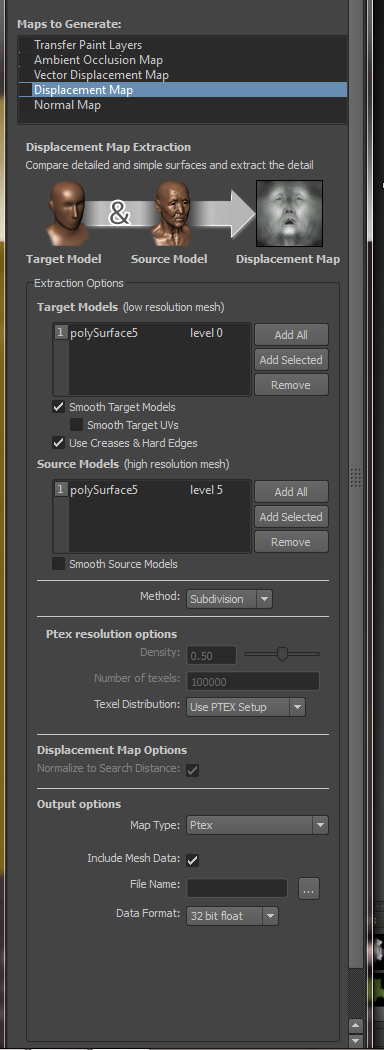
8. In the pop up select to export a 'Displacement Map'.
9.In the Target Models box: select your mesh at the lowest desired subdivision level for your basemesh - usually level 0. but sometimes level1 if you need a little more detail in the base mesh.

10. Set 'Smooth Target Models' to CHECKED.
11. Set 'Smooth Target UVs' to UNCHECKED.
12. Set 'Use Creases & Hard Edges' to CHECKED.

13. In the Source Models box: select your mesh at the highest subdivision level in my case level 5

14. Set 'Smooth Source Models' to CHECKED.
15. Set Method to 'Subdivision'
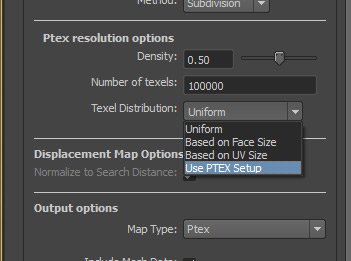
16. Change the Texel Distribution dropdown to 'use PTEX Setup' if you don't your displaceament will be small and pixelated.


17. Click the 'Base Filename' options box (...), choose a filename and directory to save your Ptex file too preferably with DISPLACE in the title.
18. Make sure Data format says '32 bit float'

Here is a pic of all settings.

19. Click the 'Extract' button to run the displacement map generation.
Your displacement map is now ready for use!


  • EXPORTING TEXTURE MAPS FROM MUDBOX
20. Select the layer your painted in the layers palette in Mudbox (see pic) Right click on the layer and select 'export selected'


21. Choose a name and location for your file. You can also choose Ptex 16 bit to keep the file size down if you wish. Save the file as DIFFUSE.


  • EXPORTING THE LOW RES MESH FROM MUDBOX
Press 'page down” key on the keyboard until you reach subdivision level 0

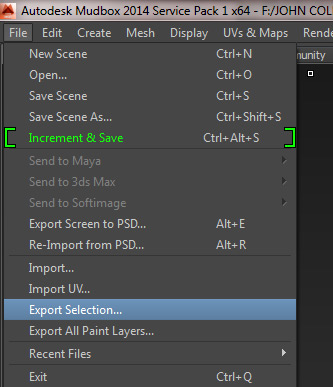
Select your mesh in mudbox and go to file>export selection. Choose a location to save your low resolution OBJ.


Now we should be done in Mudbox it's time to move to Maya and get it the displacement working! It's time to move on to PART 2. Stay tuned for that in the next couple of days!!


Monday, July 22, 2013

Ptex displacement and texturing in Mudbox to V-ray for Maya PART 2


This tutorial presumes you have already completed Part 1 and are ready to import your Mudbox model to Maya and Render it in V-ray.
  • SETTING UP PTEX DISPLACEMENT IN MAYA
  1. Open Maya and import the level 0 OBJ you exported from mudbox. Don't try and use the original base mesh that you imported into mudbox.(pic)

  2. Select your mesh, open the attribute editor, and have your object's Shape node tab selected. Then in the attribute editor's menu click 'Attributes -> V-Ray' and check 'Subdivision', 'Subdivision and Displacement Quality' and 'Displacement Control' to add those extra attributes to your mesh's Shape node.

  3. Scroll to the bottom of the attribute editor and expand the 'Extra V-Ray Attributes' rollout.
  4. Set 'Render As A Subdivision Surface' to CHECKED.
  5. Set 'Subdivide UVs' to UNCHECKED.
  6. Set 'Edge Length' to a value of 4.0 to begin with, and lower as needed for better displacement quality (At the expense of higher render times).
  7. Select 'Normal Displacement' from the Displacement Type dropdown.
  8. Set 'Keep Continuity' to CHECKED.
  9. Leave all other settings at their defaults. Here is a screen shot of the above settings to verify


  10. Right click on your model, create a VRayMtl for it with the menus 'Assign New Material' Select a vraymtl and assign it to your mesh. 


  11. With you model selected, open your hypershade, in the hypershade go to the menu graph> graph materials on selected objects. This will show the nodes for your vraymtl material.


  12. Type 'dis' in the hypershade search box. And click 'Displacement' to add a 'Displacement' node to the work area from maya's list of hypershade nodes on the left, then middle-click-drag from the Displacement node to the VRayMtlSG node and then select 'Default'.


  13. Now type 'ptex' in the hypershade search box. Add a 'Vray Ptex' node middle-click-drag from the v-ray ptex node node to the Displacement node and then select 'Other...'


  14. The connection editor pops up. On the left side of the connection editor, click the plus next to 'OutColor' to expand it and select 'OutColorR', then select the 'Displacement' value on the right side to connect them. Close the connection editor.


  15. Now select the 'VrayPtex1' node in hypergraph, open the attribute editor, and click the file icon next to 'ptex file name' and load the Ptex displacement map file you exported from mudbox during part 1 of the tutorial.


  16. Let's do a test render. Our Ptex Displacement map should be working but some of the indentations are 'filled in' let's fix that or not quite accurate.


  17. Select your mesh and open the attribute editor. Select the 'Shape' node and open up the 'extra Vray Attributes' dropdown. Down at the bottom of that you will see a black and white color swatch . Click the 'Displacement Bounds' drop down menu and select “Explicit”


  18. Click on the black color swatch below that next to 'MIN value'. A color picker comes up put '-1' in the 'V' attribute.


  19. Do another test render. Now it should be working properly!


  • ADD YOUR PTEX TEXTURE
I'm going to add a quick v-ray dome light, and a directional light with shadows so we can see our model better. I'm also turning on GI rendering because this is what I will be using in my final render.


  1. In your hypershade select your VrayMtl1 material, and pull up your attribute editor for it on the right side of maya.

  2. Now in the hypershade type ptex in the search box and create a new Ptex node, select it in the hypershade. In the atribute editor Click the file icon next to 'Ptex File Name' and locate your Ptex texture we exported from Mudbox during part 1.


  3. Now select your VrayMtl in the hypershade to bring up it's attributes.
  4. Middle mouse button click and drag the VrayPtex2 node onto the Diffuse Color slot in your vraymtl material.


  5. Open the Maya Render Settings window, go to the 'V-Ray' tab, and open the 'Global Options' rollout. Make sure that the checkbox next to 'Displacement' is checked.

  6. Render again and the texture should be applied. If you need to add any more maps bump, specular etc. Just create a new ptex node in the and middle mouse drag it into the appropriate slot of your material.


That's it! You can now use Ptex files you have painted in Mudbox in V-ray for Maya! The cool thing is it's not hard to bring your PTEX back to a UV workflow. But that is a topic of another tutorial. :) Comment below if you are interested in a tutorial on that!

Please check "HELPFUL" below if it was, if not COMMENT below and tell me why! Don't miss another tutorial or tip! Subscribe to Maya Zest


An incredible break down of all the top rendering engines

Though my personal favorite for a rendering engine has become V-ray for Maya. there are some other great ones out there. This nice long post on FX guide goes through these engines (including v-ray) and explains some of their pros and cons.

It is not so much a comparison as simply for your information. Take a look!

Complete Article Link
http://www.fxguide.com/featured/the-state-of-rendering-part-2/

Individual Catagory links

2.1 RenderMan – Pixar
2.2 Arnold – Solid Angle
2.3 V-Ray – Chaos Group
2.4 Maxwell Render – Next Limit
2.5 Mantra – Side Effects Software
2.6 CINEMA 4D – Cinema4D
2.7 Modo – The Foundry
2.8 Lightwave – Newtek
2.9 Mental Ray – Nvidia
2.10 3Delight – DNA Research
2.11 FinalRender – Cebas
2.12 Octane – Otoy
2.13 Clarisse iFX
2.14 Lagoa


Friday, July 19, 2013

Quickly convert n-gon or 5 sided polygons into quads in Maya


Often times when modeling human heads you end up with 5 sided polygons at the sides of the mouth, eyes, forehead etc. where your edge rings meet. These can potentially cause problems in the pipeline so sometimes it's best to get rid of them.

UPDATE: I'm going to add additional methods for converting n-gons to quads shortly. Keep in mind this is just one possible method, and avoids tris as well as n-gons. 

Here is a little technique to quickly change them into quads.

Select your model, go to Faces Selection mode and select the offending 5 sided face or n-gon

Then go to Polygons dropdown menu in the left. Edit Mesh>Add divisions and
click the little settings box next to "add divisions".


Make sure division levels is set to "1" and Add divisions is set to "exponentially"


Click "Add Divisions"

The 5 sided face is immediately cut into 4 quads. Now you can just run each division line into your topology and boom the n- is gon! :) You may need to adjust the resulting topology a bit to even out the detail.

Please check "HELPFUL" below if it was, if not COMMENT below and tell me why! Don't miss another tutorial or tip! Subscribe to Maya Zest

Slide a vertex along an edge in Maya


Simple unless you don't know how to do it :). Select the vertex, hold the "c" key on the keyboard. Then middle mouse button click and drag on the edge close to it that you want to slide it along.

Please check "HELPFUL" below if it was, if not COMMENT below and tell me why! Don't miss another tutorial or tip! Subscribe to Maya Zest

Tuesday, July 9, 2013

How to make volumetric lights and fog in V-ray for Maya (God rays)


This is not that hard to accomplish but no one ever writes tutorials on it! How frustrating... here is how to do it.

NOTE: The fog effect will be affected by the scale of your scene so probably best to work in real world scale. This tutorial was done at a relatively small scale so you may need to adjust your numbers some from my values.

First set up the scene for you shafts of light. In this case we are going to make a window with sunlight flowing in the window.

I've created a simple hollow box with a cut out in the wall for the window.


Create an area light top create menu>lights>v-ray rect light. and position it in your window to give you some soft ambient light filtering int other room.


Now in your V-ray render settings. Indirect illumination tab let's turn on GI.


Now create a normal spot light creat menu>lights>spot light.

Position your spot light so that it some distance away from your window and focused in on it. Narrow the angle on the light so that it's literally spotted right on the window.If it helps you can select the light in the outliner and then in your viewport Panels>Look through select to aim it
right in line wit the opening. Make sure to turn on "Use Raytrace Shadows" in your spot lights settings.

You should have something like this we can see the spot light gently hitting the floor.


Now let's turn on volumetrics. Goto your V-ray render settings. v-ray Tab. Then to the Environment sub drop down. Turn on "Use environment volume" checkbox. An press the checkerboard box to load it.


The create render node screen comes up. Type "fog" in the quick search box at the top option to select Vray Environment.


Now press the arrow next to the Environment Shader to see the settings for your fog effect. Let's do a test render.


At the default settings the scene may be very dark or even render black. This is because of how thick the fog is.

Now you could turn the fog density down, but then you will lose your "shafts effect" so let's instead turn the lights up.

First turn your area light at the window up to 3.


Now let's turn our spot light up to 300.


And now we finally have shafts beginning to show up. Everything is pixeled though so go back to your fog settings.

Render settings>V-ray Tab>environmental drop down. Press the right arrow. And turn up the Subdive setting on your fog to 32. Then turn the Shadows rays up on your area light and spotlight to 24. To smooth things out.


This should give you a good starting place for creating volumetric light effects on your own. Here is a great


To get even more realism in your Fog you can play with the Scatter GI properties in your fog attributes. Set it from 50-200 to see the effect of the GI bouncing around in the Fog.

The final render is looking much better. Now go make some sweet volumetric scenes with V-ray for maya!!
Please check "HELPFUL" below if it was, if not COMMENT below and tell me why! Don't miss another tutorial or tip! Subscribe to Maya Zest