1.Make sure your t-posed starting BVH file is open.
2. Drag and drop the bone template you created into viewport then select merge> noanimation. Or go to file>merge and select your file to bring the template into MB. When it tries to open uncheck any takes of animation if it tries to bring them in.
3. Now in the navigator window select character>character and then choose the "Character Definition" tab directly to the right next to the "character settings" tab.
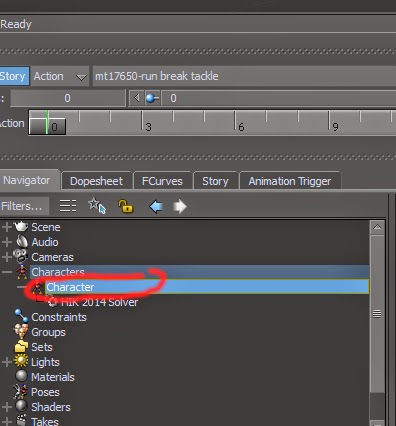
In the character Definition tab below you should see two sections "mapping list" and naming template"
the naming templates in the required base section should be filled with bone names while the Mapping list sections should say "drop Object here" Waiting for the mapping from your template.

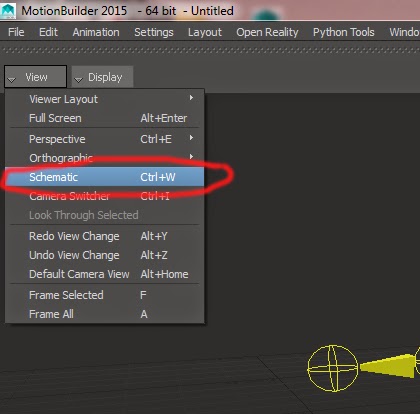
4. Open shematic view in the viewer, >View menu> schematic. Then you may need to hit F to find the nodes, or zoom out to see them. Once you see them select all bones you want to map from the bone template to the skeleton by dragging a box around them all.

6. If all went as it should and the template does indeed match then the skeleton definition representation should be all green with no errors. Mapping list and naming template lists should match.
7. Now press the little characterize checkbox in that character definition window.
8. It will give you
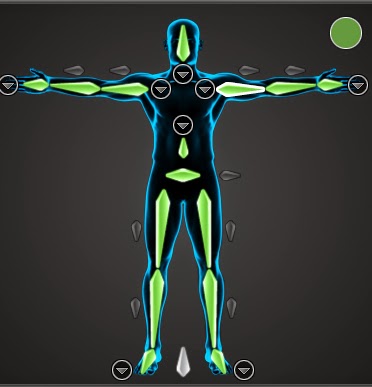
a message saying character must be in stance pose facing Z. Select bi-ped
9. Now that your character is characterized properly the last thing you need to do before saving it out is push the keyframes over so that the t-pose is on "-1" instead of "0". This will help aviod problems later when you try and use the clip in story mode.
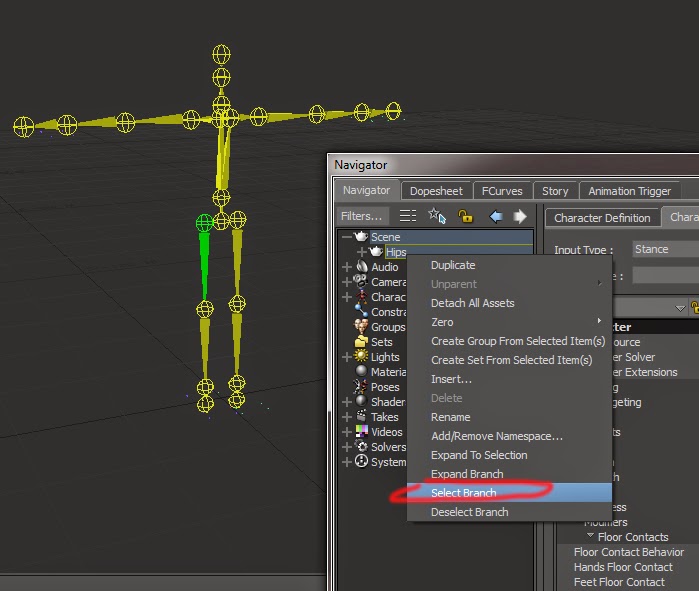
10. Select one bone in the viewer then in the navigator right click the hip bone and select all branches to select all bones.
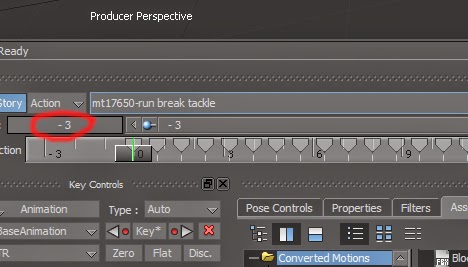
12. Now click drag around ALL the keyframes (MAKE SURE YOU GET THEM ALL AND THAT YOU ARE VIEWING ALL OF THEM TO BEGIN WITH) to select them. Drag them over one frame.
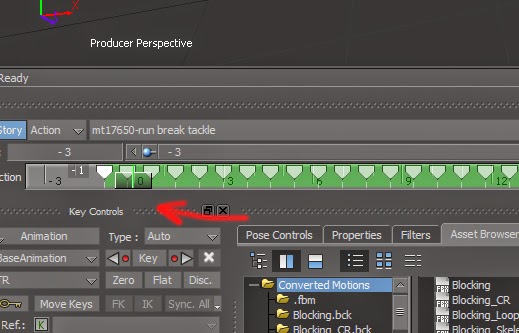
13. Now the t-pose should reside on keyframe "-1" and the animation starts at "0"
14. Then go to file>save as in the menu. It will save your FBX clip. Make sure that your animations take is checked ON so that it will include the animation in the FBX.
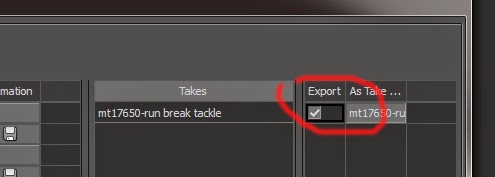
NOW this FBX clip can be dropped into story mode!